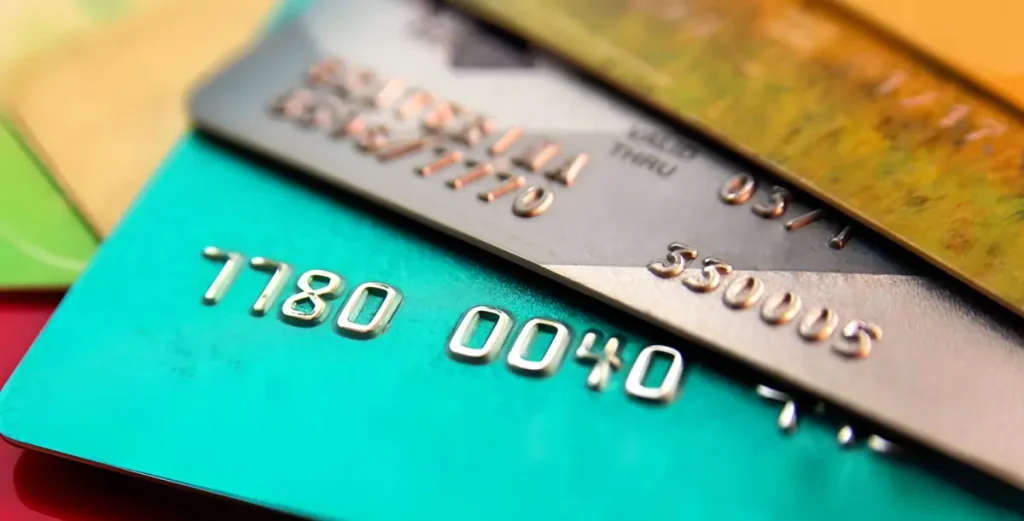
Getting started with crypto begins with a wallet. Think of it as your personal control panel for digital assets—where you receive, store, and send coins and tokens. With hundreds of millions now holding crypto globally, learning crypto wallet basics is as practical today as mastering online banking was a decade ago—by 2025, an estimated 861 million people worldwide owned cryptocurrency.
What is a crypto wallet?
A crypto wallet doesn’t “hold coins” the way a bank account holds cash. A crypto wallet is a tool (app, hardware device, or web service) that stores your private keys and uses them to prove ownership and sign transactions on a blockchain.
Assets live on a blockchain; your wallet stores private keys that prove you’re allowed to move them. Wallet apps manage these keys (and often a human-readable backup called a recovery/seed phrase). Lose those keys and you can’t move your funds as no help desk can restore them.
In short, a crypto wallet is your key manager. Lose the keys, lose access; protect them, and you control your crypto.
Custodial vs. Self-Custodial Wallets
Custodial wallets (typically on exchanges or fintech apps) hold the private keys for you—so access works like a normal web login (email/2FA/reset link). That’s convenient for beginners, comes with integrated buying/selling, and sometimes includes fraud monitoring or insurance on custodial accounts.
The trade-off is trust. You’re exposed to the company’s security, solvency, and compliance decisions (account freezes, withdrawal limits, KYC). If the custodian is hacked or goes bankrupt, you may face delays or losses.
Self-custodial wallets (MetaMask, Trust Wallet, Ledger, Trezor, etc.) put you in control of the keys and a 12–24-word recovery/seed phrase. No one can freeze your funds—and no one can recover them if you lose the phrase. You’ll approve transactions yourself, often per dApp, and you can connect to DeFi, NFTs, and on-chain apps freely.
The trade-off is responsibility. You must back up the seed phrase offline, guard against phishing, verify addresses, and keep software/firmware updated. A good pattern is to create multiple accounts and avoid reusing the same wallet for everything (separate “spend,” “DeFi,” and “vault” accounts).
Hot vs. Cold Wallets
Hot wallets are connected to the internet—mobile apps, browser extensions, or web wallets. They’re great for day-to-day use: quick swaps, minting an NFT, paying a friend. Because they’re online, they’re more exposed to malware, phishing, and compromised browsers.
Reduce risk by using hardware-backed signing (e.g., Ledger + MetaMask), enabling biometrics/2FA, whitelisting spend limits, and keeping a modest balance in hot wallets.
Cold wallets (hardware devices like Ledger or Trezor, or fully air-gapped setups) keep private keys offline. You confirm each transaction on the device screen, which blocks most remote attacks. That makes cold storage ideal for long-term holdings or larger balances.
The trade-offs are speed and convenience. While a hot wallet lets you send crypto in seconds, a cold wallet transfer can take 2–5 minutes, depending on how quickly you connect the device, authenticate, and approve the transaction. You’ll also need to securely store both the device and your seed backup—ideally engraved on metal and locked in a safe.
Choosing the Right Crypto Wallet
Before you download the first wallet you see, decide what you actually need. Wallets are trade-offs between convenience, control, and security—there isn’t a single “best” choice for everyone. A clear picture of your habits (how often you transact), your risk tolerance (how much you’ll store), and your stack (which chains and apps you’ll use) will point you to the right setup—often a mix of wallets rather than just one.
How often will I transact?
If you’ll be on-chain most days (swaps, NFTs, gaming, DeFi), start with a reputable hot wallet for speed and app compatibility, then add a hardware wallet for higher-value actions. A common pattern is pairing a browser/mobile wallet (for discovery and approvals) with a hardware signer (for actual transaction signatures), so the private key never leaves the device. Keep balances in your “daily” wallet modest and sweep profits to cold storage on a schedule.
How much will I store?
For larger, long-term holdings, prioritize cold storage from day one. Hardware wallets (or fully air-gapped setups) dramatically reduce online attack surface, and most support multiple accounts so you can separate “vault” funds from “spend” funds. Back up your seed phrase offline (preferably metal), add a passphrase if supported, and test your recovery process with a tiny transfer before moving to serious value.
Which networks will I use?
Match the wallet to your chains. For Ethereum & EVM ecosystems, MetaMask, Rabby, and most hardware wallets are well supported. For Bitcoin, consider Electrum or a hardware wallet with PSBT support. For Solana, Phantom pairs well with Ledger/Trezor. If you’re multichain, look for wallets with built-in chain switching, clear signing prompts, and easy viewing of token approvals. Avoid “all-in-one” claims that sacrifice security or transparency.
Do I want to avoid seed phrases?
If managing a single 12–24-word seed feels risky, explore MPC (multi-party computation) wallets that split key control across devices or providers. There’s no single seed to safeguard, recovery can use multiple factors (email, device + guardian approvals), and policies (spend limits, multisig-like approvals) are programmable. You’re still responsible for recovery settings and trusted contacts, so configure them carefully and rehearse the flow.
Do I prefer a plug-and-play experience?
Custodial wallets at exchanges or fintech apps are the easiest on-ramp: simple login, fiat purchase, and one-tap transfers. The trade-off is counterparty risk and potential withdrawal limits. If you go custodial, harden your account: enable hardware-key 2FA (not SMS), set withdrawal allowlists and anti-phishing codes, and keep only the balance you actively use. Move long-term holdings to self-custody.
Pro tip: many users run a hybrid setup—custodial for fiat on/off-ramp, a hot wallet for daily activity (hardware-backed where possible), and a cold wallet or MPC wallet for reserves. Review connected dApps and token approvals monthly, and keep software/firmware up to date.
How to Set Up a Crypto Wallet Safely
Before you move any value on-chain, slow down and set things up with a security-first mindset. The goal is simple: make it hard for attackers to steal your keys and easy for you to recover if something goes wrong. Below are three common setups, each with a short, practical flow you can follow. Start with tiny test amounts, verify everything works, then scale up.
Self-custodial software wallet
- Install from official sources only. Use the project’s verified website or app-store link from that site; double-check the publisher to avoid fake apps.
- Lock the app. Set a strong passcode and enable biometrics if offered.
- Back up the recovery phrase offline. Write the 12–24 words on paper or (ideally) a metal plate. Don’t screenshot, email, or cloud-store it. Keep backups in separate, safe places.
- Enable protections. Turn on anti-phishing warnings, transaction notifications, and spam-token filters.
- Test with a tiny amount. Receive a small transfer, then send a small amount out to learn fees and signing.
- Operate safely. Watch for “address poisoning” (look-alike addresses), and periodically review/revoke token approvals on DeFi sites.
General setup guidance like this mirrors reputable how-to resources (Investopedia/Wired) and will feel familiar across major wallets.
Hardware (cold) wallet
- Buy direct from the manufacturer. Avoid third-party resellers to reduce tampering risk.
- Initialize on the device. Generate the seed on the hardware, never on a computer/phone. Record it physically (paper/metal). Consider a passphrase (“25th word”) only if you fully understand it.
- Use the official companion app. Install Ledger Live, Trezor Suite, etc., and update firmware only through the app.
- Optionally pair with a hot wallet. Use the hardware device as the signer in MetaMask/Rabby so keys never leave the device while you interact with DeFi.
- Test before scaling. Do a small receive/send to confirm addresses and paths. Treat the device like a safe; store it securely and avoid public computers.
- Practice recovery. Do an annual test with a throwaway wallet so you’re confident you can restore if the device is lost.
Well-known guides emphasize the same core practice: protect the recovery phrase, treat the device like a safe, and test with small amounts first.
MPC (seedless) wallet
- Create the wallet; let it split key control. Shares live across your devices and/or trusted providers so no single party holds the full key.
- Enroll recovery factors. Add device biometrics, email/phone, and (optionally) guardians/admins who can help you recover.
- Set policies. Configure daily limits, multi-approver thresholds, geofencing/IP allowlists, or time locks if available.
- Read the vendor’s recovery docs. Confirm you can rotate/replace shares, migrate, or export if you switch providers.
- Test live. Send a tiny transaction and perform a recovery drill (simulate a lost device) to validate the workflow.
- Harden the environment. Enable all security options, document recovery steps for yourself/your team, and choose reputable providers.
MPC reduces a single point of failure (a single seed), but you’re trusting an implementation. Pick a reputable provider and read its recovery docs carefully.
Security Essentials You Should Not Skip
Setting up a wallet is only half the job; keeping it safe is an ongoing practice. Crypto transactions are irreversible, attackers are inventive, and one small mistake (like losing a seed phrase or signing a malicious approval) can mean permanent loss. A solid security routine doesn’t have to be complicated—it just needs to be deliberate, layered, and rehearsed. The essentials below will help you prevent the most common failures before they happen.
Back up properly.
Your recovery phrase (seed) is the master key to your funds. If you lose it—or someone else copies it—you’re done. One well-publicized user survey found 35% of MetaMask users hadn’t backed up their seed phrase, which is a recipe for irreversible loss if a device dies.
Don’t be that user. Write the phrase down neatly, verify every word, and store it in two separate, safe locations (consider a fire/water-resistant metal backup). Never screenshot or cloud-store it. Do a dry run. Restore a test wallet on an offline device to confirm you can actually recover—then store that device separately.
Assume you’ll be targeted.
The FBI reported $12.5B in cybercrime losses in 2023, rising to $16.6B in 2024, with crypto investment fraud up ~66% to at least $9.3B. Scammers impersonate support staff, spin up fake “airdrop” sites, and push wallet-drainer links.
Treat every unexpected DM, pop-up, or signature request as hostile until proven otherwise. Sign only what you understand (watch for dangerous permissions like setApprovalForAll or unlimited token allowances), and use transaction simulation where available.
If something feels off, stop, verify the official link from a project’s website/X profile, and try again with a “burner” wallet first.
Harden your setup.
Use a hardware wallet (or a wallet-specific passphrase) for meaningful balances. Hardware signers keep private keys offline and dramatically reduce the risk from malware. If you understand it, a passphrase (“25th word”) adds another layer—but don’t enable it unless you can back it up properly.
Enable strong 2FA and local locks. For custodial accounts, prefer authenticator apps or hardware security keys over SMS. For apps, set a PIN/biometric and lock your phone/laptop. Consider withdrawal allowlists and session alerts on exchanges.
Keep software/firmware current, and bookmark official sites. Updates patch real vulnerabilities. Only update firmware via the official companion app, and avoid clicking update prompts from random sites. Bookmark dApps you use to dodge phishing domains.
Revoke stale token allowances. On EVM chains, unlimited approvals are a common exploit path. Periodically revoke allowances you don’t need using trusted tools; re-approve only what’s necessary.
Never enter your recovery phrase into a website or “support form.” No legitimate service needs your seed. If anyone asks for it, it’s a scam—full stop.
Buying and Funding Crypto Inside a Wallet
Most modern wallets give you two practical ways to get funded: buy inside the wallet via an integrated on-ramp, or buy on an exchange and withdraw. The in-wallet route uses third-party payment partners that accept cards, bank transfers, or local rails. It’s convenient because you never leave the app, but expect identity checks (KYC), purchase limits while your account “seasons,” and higher convenience fees than an exchange. Card purchases often settle fastest but can carry higher fees and are subject to stricter fraud checks; bank transfers (ACH/SEPA/Faster Payments) are cheaper but may take hours to a couple of business days to clear.
Regional rules matter as some assets or payment methods won’t be available in your country, and certain transactions may be blocked if the on-ramp’s compliance filters flag them. Before you buy, review the partner’s fee table, supported networks, and refund/chargeback policy—and make sure you’re dealing with the official integration, not a spoofed pop-up.
If you prefer lower fees and more control, you can purchase on a regulated exchange and withdraw to your wallet. The basic flow is: verify your exchange account (KYC), buy the asset, then withdraw to your self-custody address. Here, precision matters.
Double-check you’re withdrawing on the correct network (e.g., ETH on Ethereum vs. ETH on an EVM sidechain like Arbitrum), and include any required memo/tag for assets like XRP or XLM(especially if you’re sending to an exchange wallet). Always start with a small test transfer to confirm the route works end-to-end; once it lands, send the full amount.
Know the exchange’s withdrawal fees, daily limits, and potential manual reviews (large or unusual withdrawals can trigger compliance holds). For extra safety, enable a withdrawal allowlist so funds can only go to pre-approved addresses.
A third path is peer-to-peer (P2P) funding—receiving crypto from a friend, OTC desk, or employer. This can be fast and cheap, but do an address “sanity check” (send a tiny amount first), beware of address-poisoning attacks (where look-alike addresses appear in your history), and confirm which network the sender will use (e.g., USDC on Ethereum vs. USDC on Solana are different assets).
Whichever option you choose, keep basic hygiene: bookmark official sites, verify URLs inside the wallet’s help section, and store receipts and transaction IDs for accounting and tax reporting. Finally, remember that buying or receiving crypto may create a taxable event in your jurisdiction; log costs, timestamps, and gas/fees so your records are audit-ready.
Conclusion
Setting up a crypto wallet isn’t difficult—but doing it safely takes intention. Start with small amounts, document your recovery details, and scale your setup (hardware signer, allowlists, policies) as your balances grow. With the right wallet and disciplined security habits, you’ll be ready for the next wave of Web3 apps, tokenized assets, and on-chain services—on your terms.